LeaseFHS
LeaseFHS – CRM
Client Profile
FreeStand Home Solutions is a corporate housing rental management company striving to transform how short-term furnished rentals and corporate housing are presented in the current market.
Client Industry
Real Estate
Business Challenges
LeaseFHS set its sights on swapping out its third-party software for a tailored CRM system that could effortlessly handle inbound and outbound sales, customer bookings, and guest management.
They also required the new CRM to integrate smoothly with their existing tools and website, while providing automated workflow capabilities.
Solution
Plego team engaged in brainstorming and successfully crafted a customized CRM (Customer Relationship Management) system for LeaseFHS.
This CRM system was designed to help sales representatives stay on target with the right deals and keep track of leads.
Moreover, it empowers the admin to efficiently handle client bookings, send invoices via the reservation module, and monitor client payments.
Plego assisted LeaseFHS in streamlining their sales process, gaining valuable insights, and improving their ability to analyze by adding different modules, which allowed them to:
- Seamlessly process quotes through the Booking/Reservation module, including payment system integration.
- Effectively manage guests by recording their booking dates and profile information.
- Simplify task management for employees, allowing easy task assignment and tracking.
- Implement a calendar module for housekeeping and cleaning scheduling.
- Efficiently manage media content, enabling the addition, viewing, and updating of videos, pictures, and documents.
- Centralize all communications, including emails, texts, and calls.
- Help clients report issues with photos or short videos using the Ticket System Module.
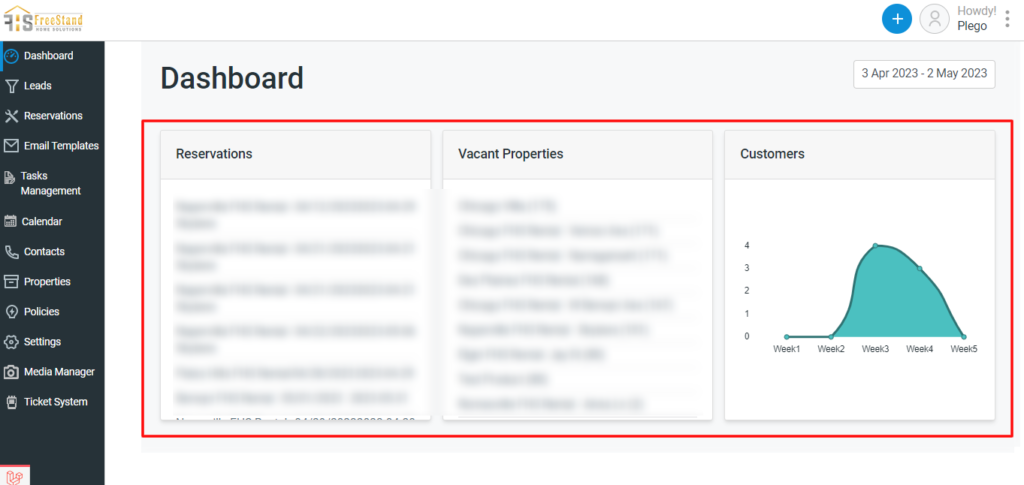
Dashboard
We empowered admins with comprehensive progress tracking, from leads and reservations to customer data, all at a glance through intuitive analytics and dynamic graphs on a user-friendly interface.
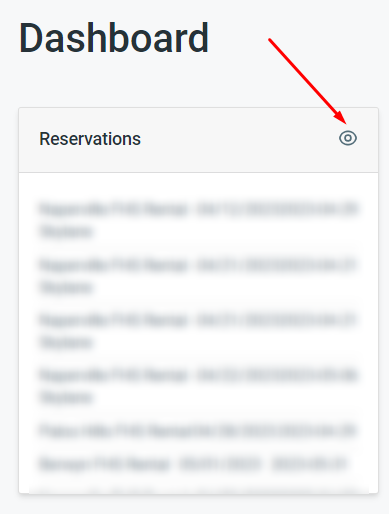
By clicking the eye button, the Admin can see specific insights for that section.
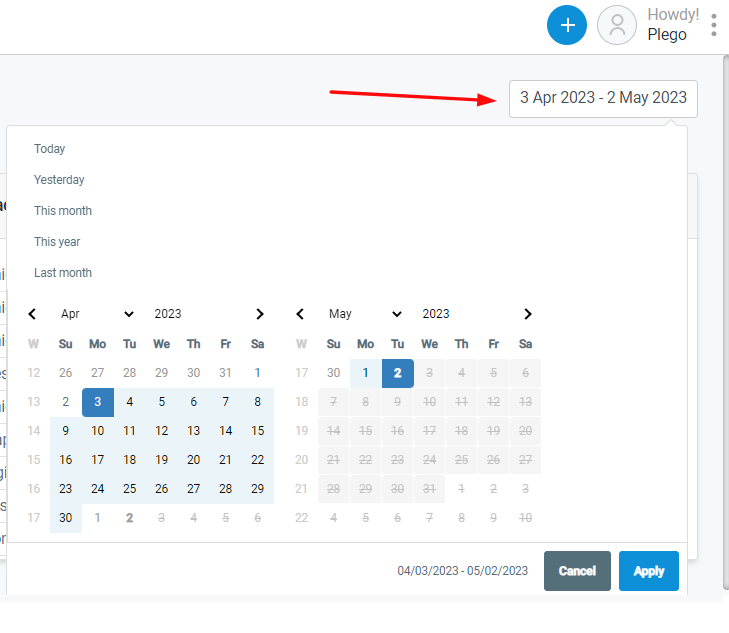
In the dashboard, the Admin can select a data viewing timeframe by clicking the date in the upper right corner.
The three dots located in the top right corner grant the Admin access to the Account section, allowing them to view and update details.

Leads
Selecting “Lead” in the sidebar navigation opens an interface with four containers: Leads, Pending Leases, Completed Leases, and Tenants
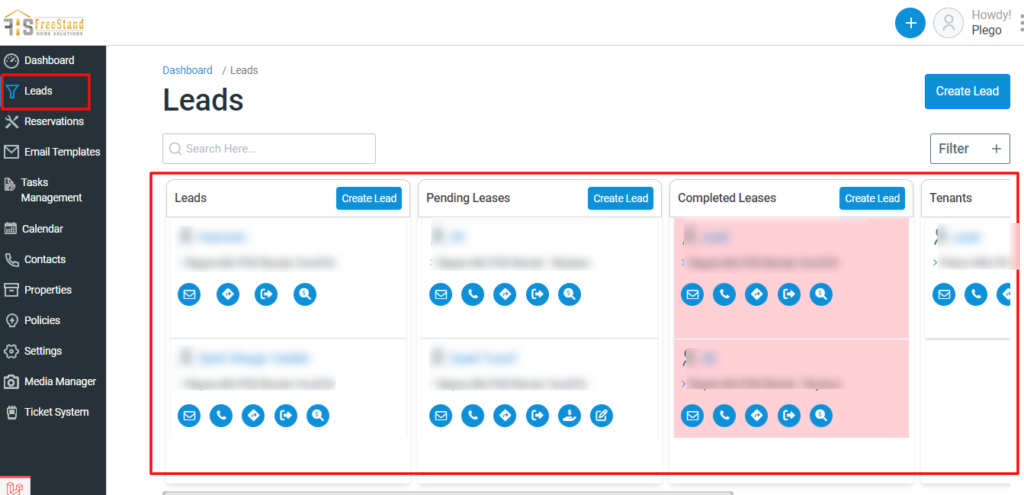
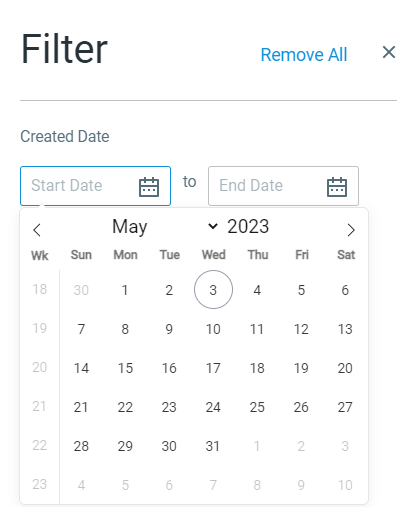
The Filter button in the top right corner empowers the admin to filter leads by specifying a start and end date on the calendar.
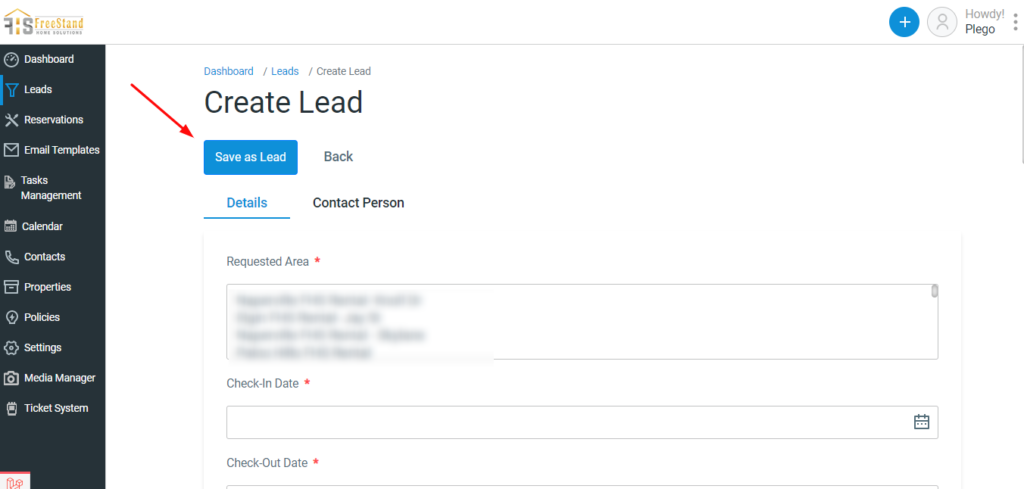
The “Create Lead” button located in the top right corner provides the admin with the option to manually create and save a lead.
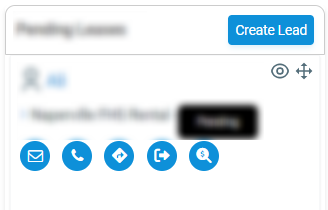
The icons located beneath each container indicate the status of emails, phone numbers, check-in and check-out dates, as well as the payment status of the customer.
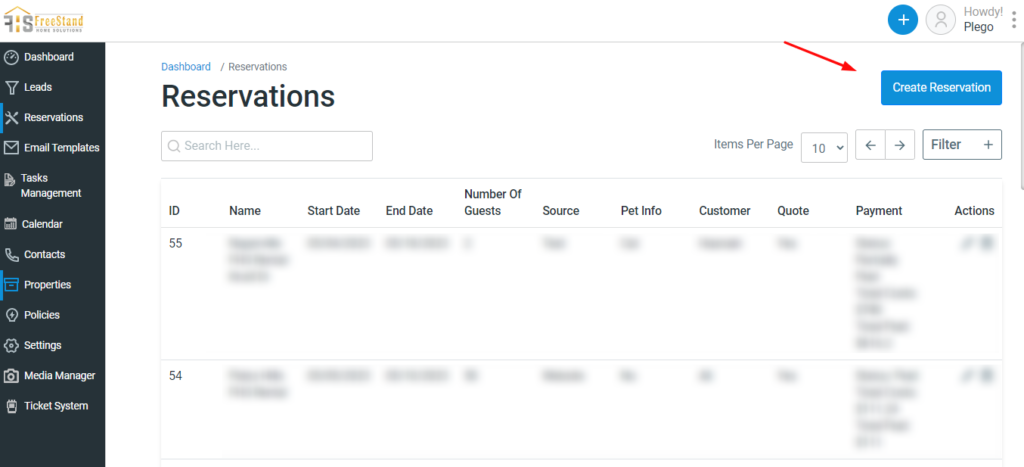
Reservations
To create a reservation, the admin can click on the “Create Reservation” button. All reservations will then be accessible within the subsequent interface.
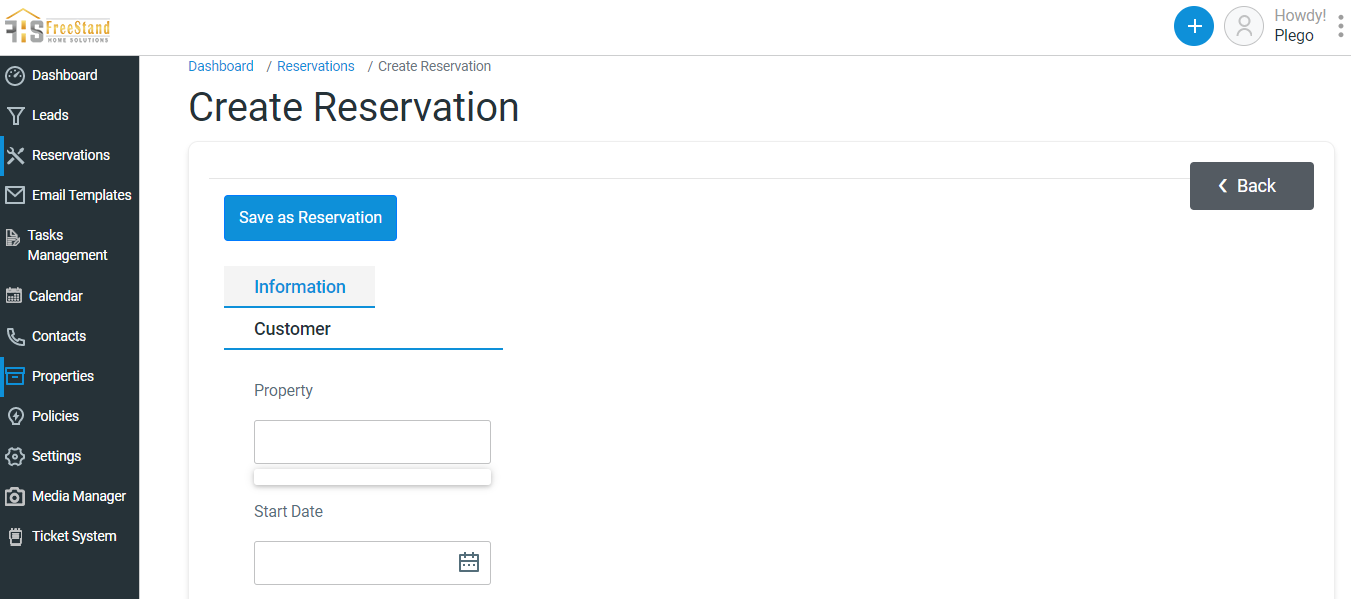
When the admin clicks the “Create Reservation” button, it redirects them to an interface where they are required to enter all the customer’s information, including sending them the quote.
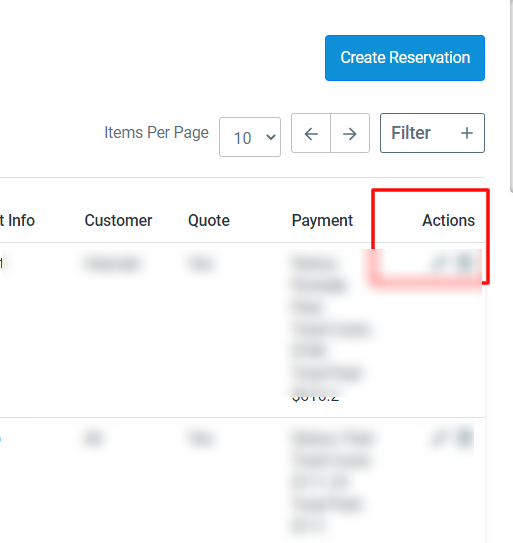
In the “Actions” section, the admin has the option to either edit or delete the reservation.
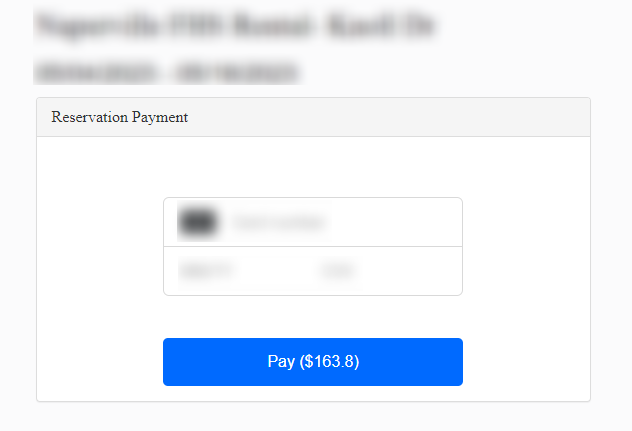
Once a reservation is created, the customer receives an email containing a “Pay” button.
By clicking the “Pay” button, the customer is redirected to the following section where they can enter all their banking details. They can then click the “Pay” button to finalize the transaction. Following the successful payment, the payment status under the reservation section will be updated accordingly.
Income Tracker
The Income Tracker section allows the admin to monitor customer details, such as the daily rent cost and revenue. Additionally, the admin can gain monthly insights by using the “Select Month” filter located in the top right corner.
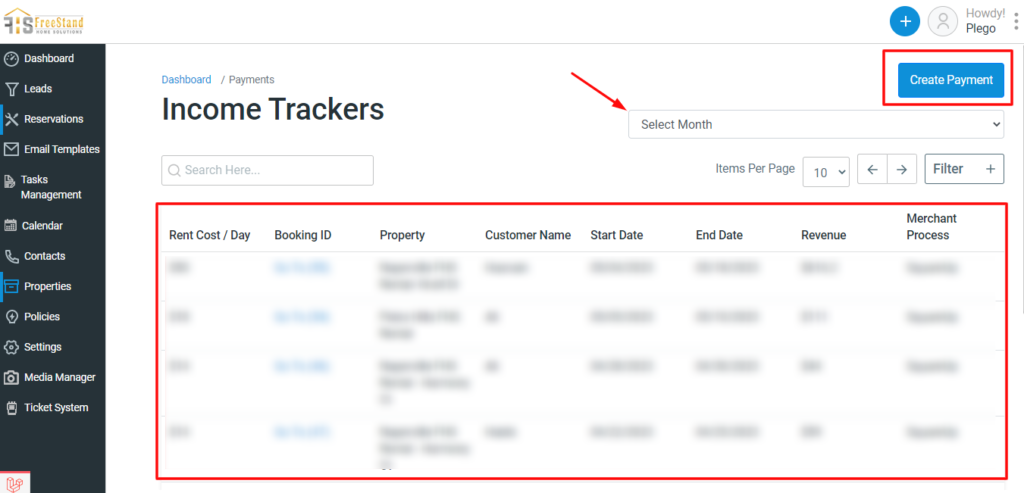
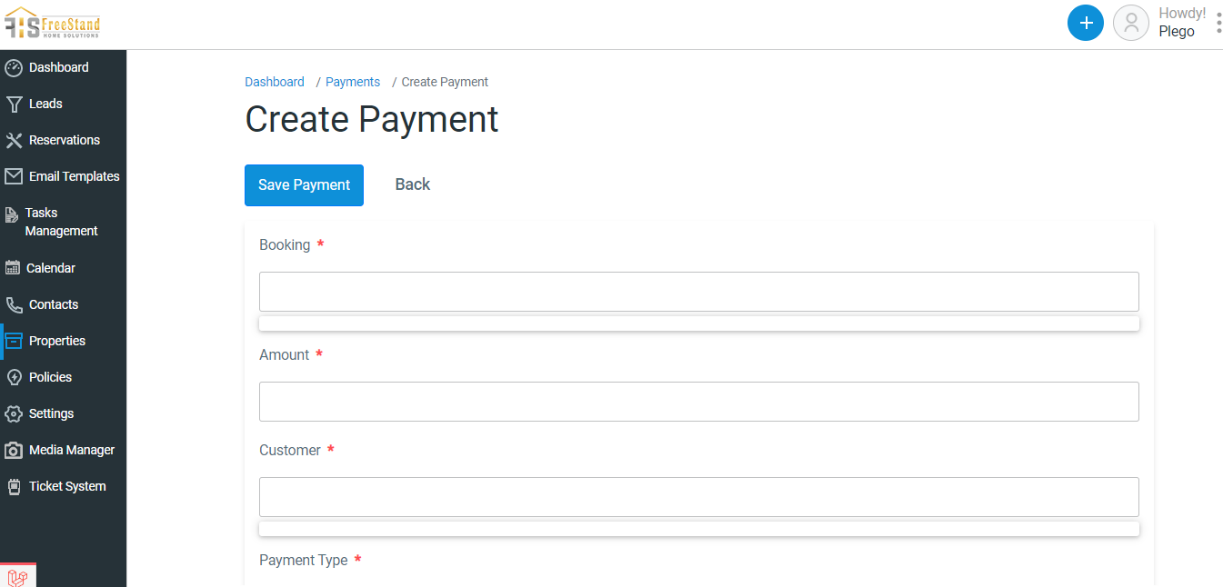
The “Create Payment” function permits the admin to manually generate a payment for any customer. They can do so by completing the provided form and then clicking the “Save Payment” button.
Emails
To create a new email, Admin can simply click the “Create Mail” button located in the top right corner under the Email Templates Module. These emails can be designed using variables to add dynamic content.

Task Management
This section compiles all the tasks assigned to employees, complete with their descriptions, deadlines, and current statuses. It also provides the option to edit or remove tasks as needed.
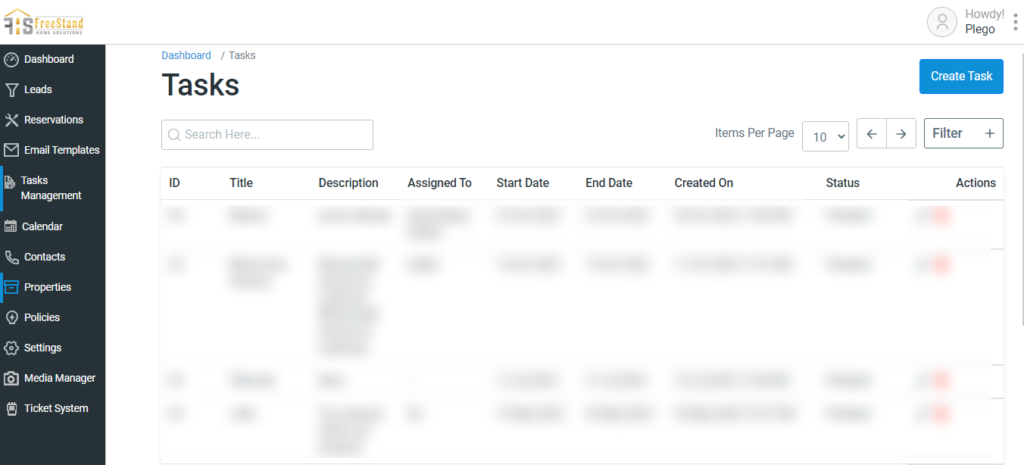
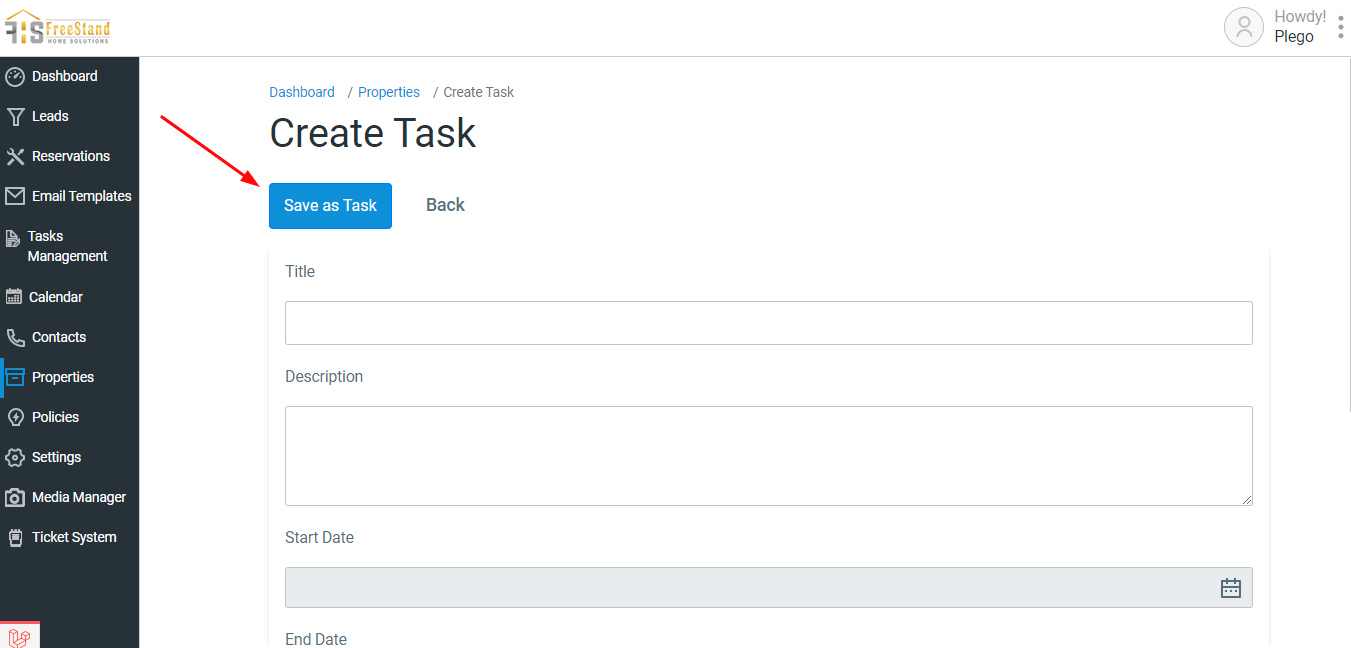
Tasks can be generated by clicking on the top right corner of the main screen. The subsequent form enables the admin to input the necessary task details.
Calendar
The Calendar highlights days when reservations cannot be made for specific sites due to scheduled maintenance/housekeeping dates.
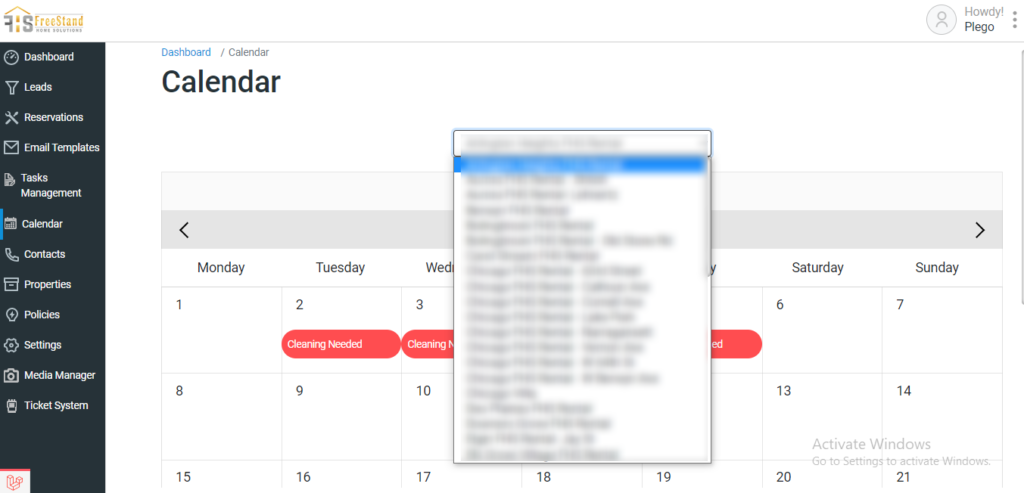
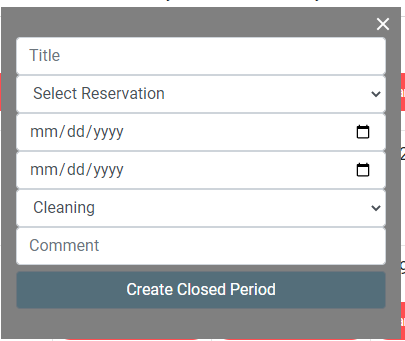
Clicking on any date on the calendar also opens a popup, allowing the admin to either navigate to the reservation section by clicking on a quote, proceed manually without a quote, or create a closed period by inputting the necessary details.
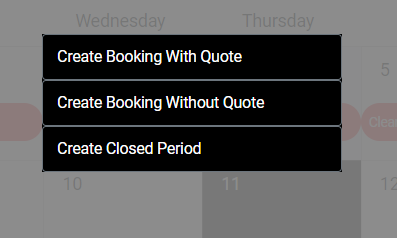
Upon clicking on a “Closing Period,” the admin can provide details regarding the reason for closing that particular time frame.
Contacts
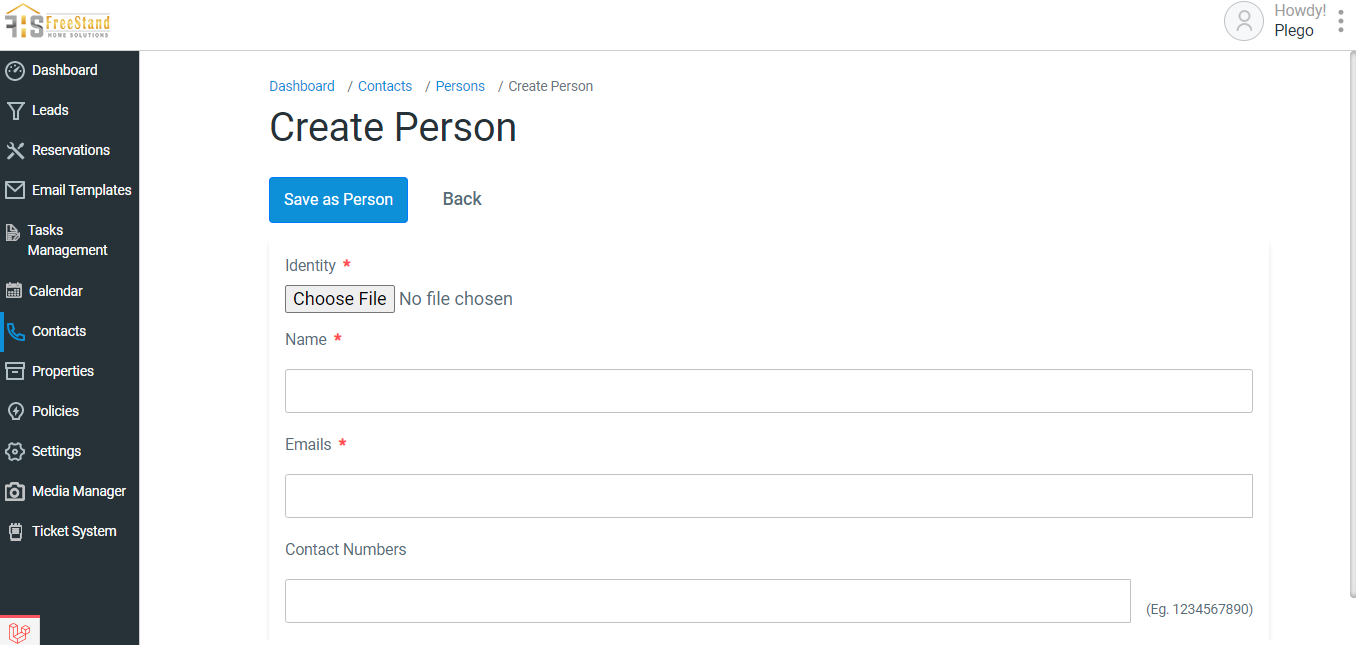
In the Contact section, customer information is automatically retrieved through reservations. Alternatively, the admin can manually add information by clicking the “Create Person” button in the top right corner. Furthermore, the admin can edit or remove a person by utilizing the corresponding actions listed under the “Actions” column.
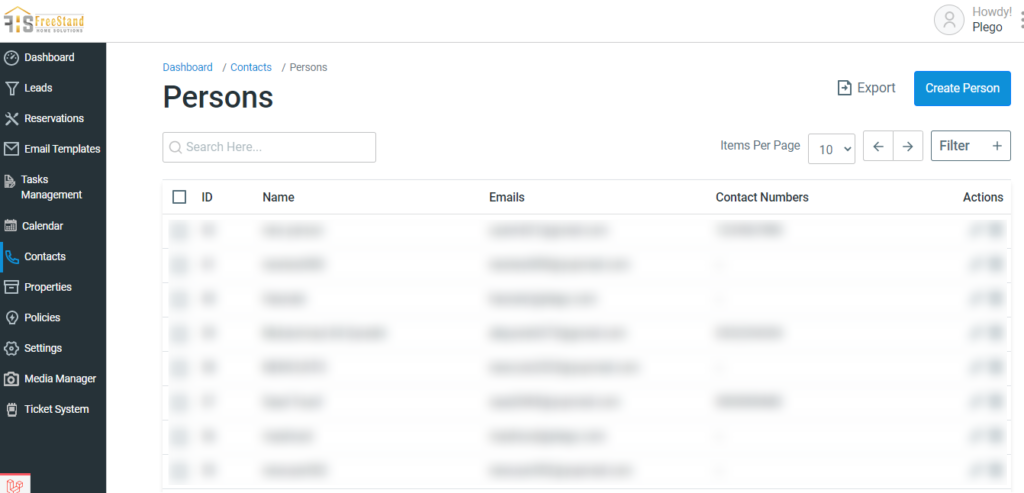
When the admin clicks the “Create Person” button, they are directed to a section where they can input the customer’s details.
Properties
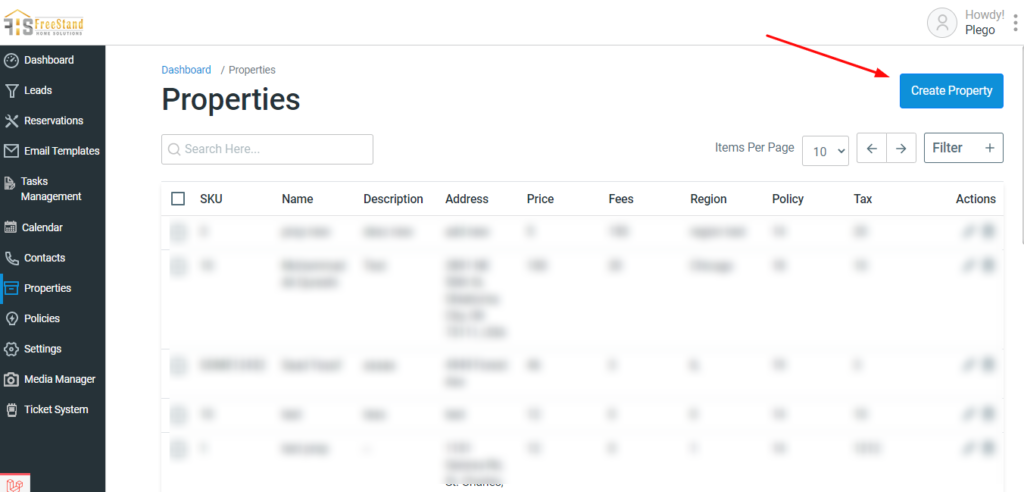
The Properties Interface presents all property-related information, granting admins the ability to edit, delete, or create new properties by utilizing the “Create Property” button.
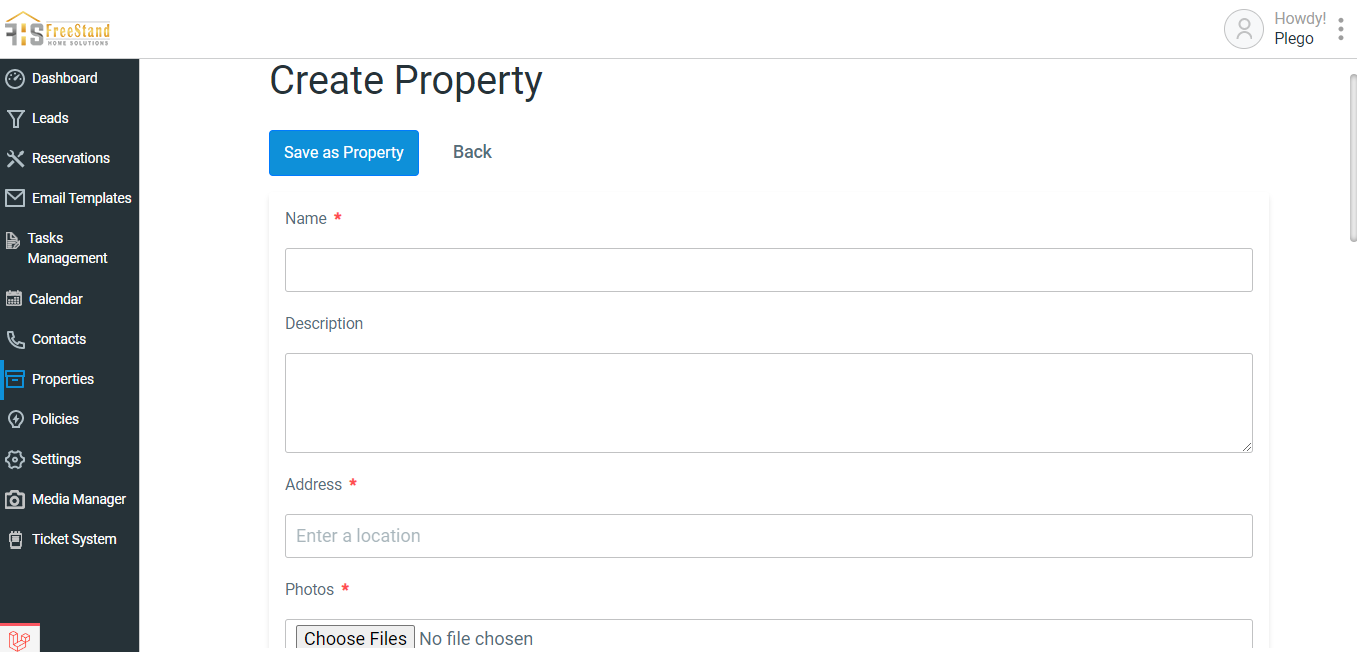
To create a new property, the admin can simply click the “Create Property” button and proceed to fill out the required details in the provided form.
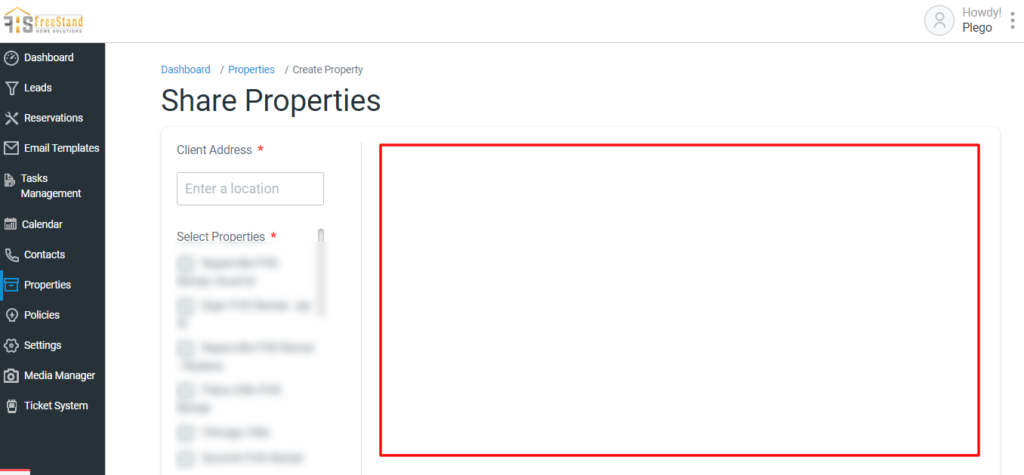
The “Share Properties” interface allows the admin to enter a customer’s location and search for nearby properties. Once the location is input, the highlighted area will display a Google Map showing the relevant properties.
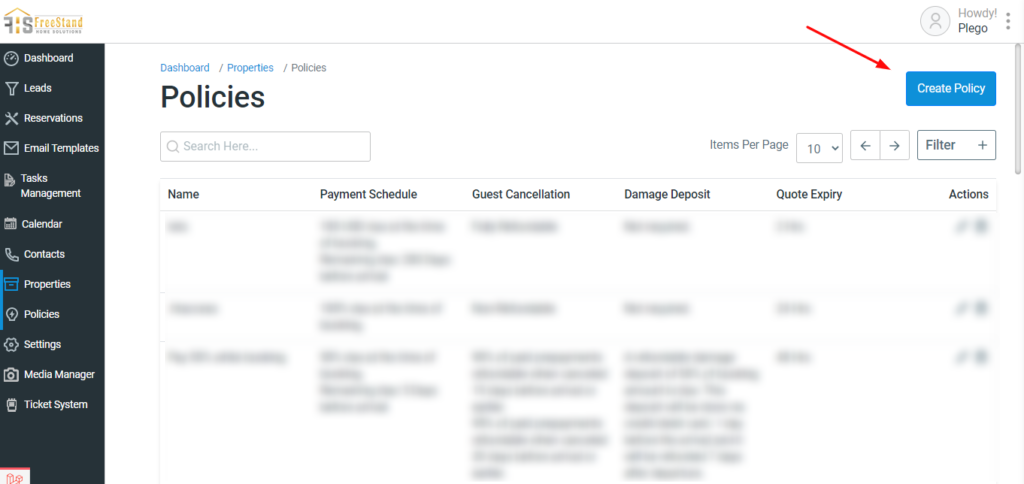
Policies
The Policies interface offers an overview of policies concerning customers and properties. It encompasses information regarding payment schedules, guest cancellations, damage deposits, and quote expiry. The admin has the option to create a new policy by clicking the “Create Policy” button and can also edit or delete existing policies through the Actions column.
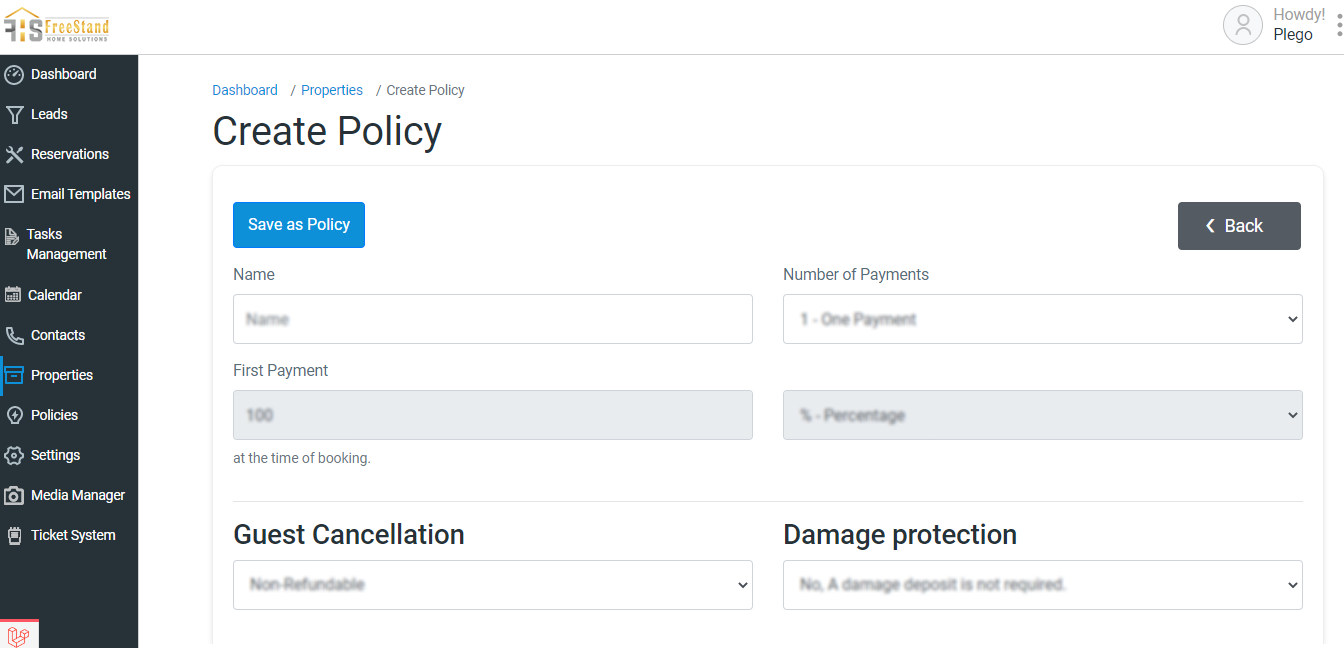
Creating a new policy involves the admin filling out essential details, including the policy name, payment schedule, guest cancellation policy, damage deposit policy, and quote expiry. After completing all the necessary fields, the admin can save the policy by clicking the “Save Policy” button.
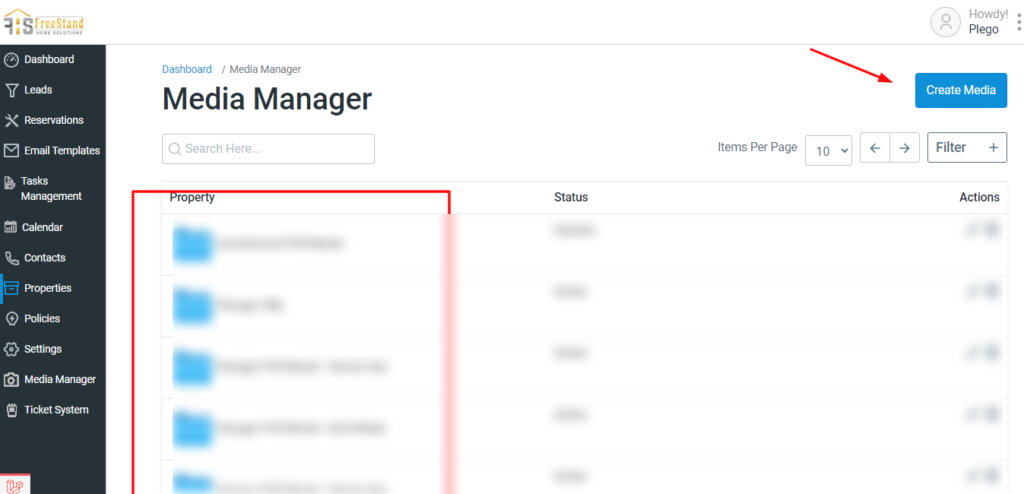
Media Manager
This section presents property names and provides the admin with the capability to edit or remove existing property items. Furthermore, the admin can include new property items for media by simply clicking on the “Create Media” button.
The admin selects a name for the property and saves it for it to be displayed on the main interface of the Media Manager.
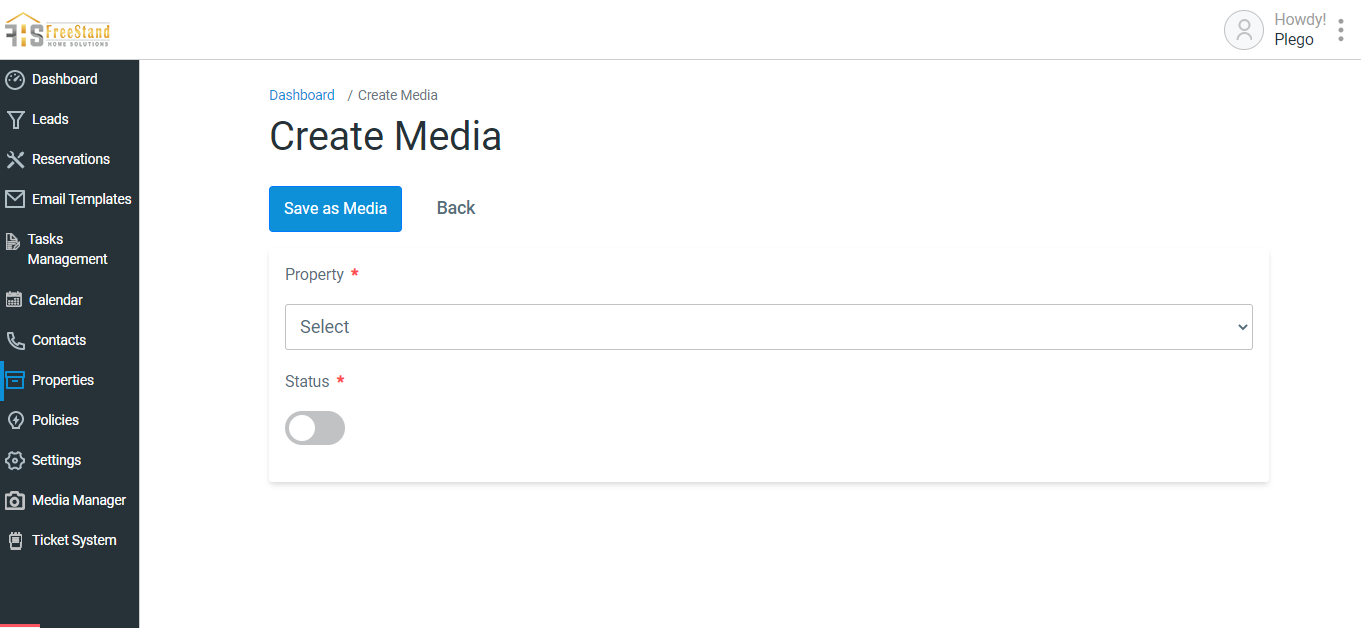
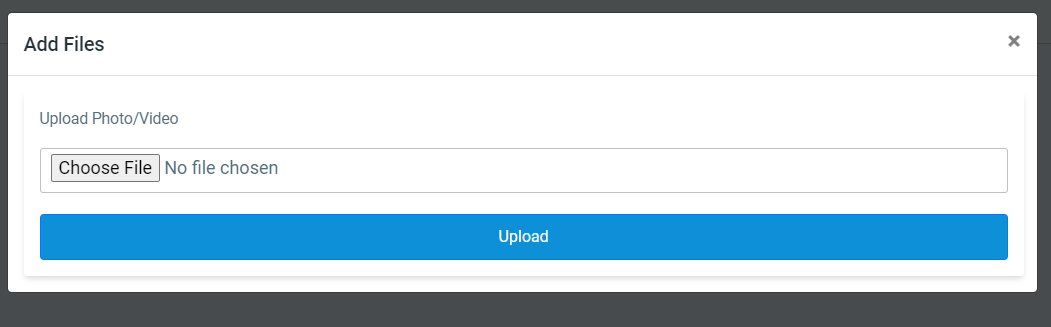
Clicking on each property allows the admin to access an interface where they can upload media files by clicking the “+ Add File” button.
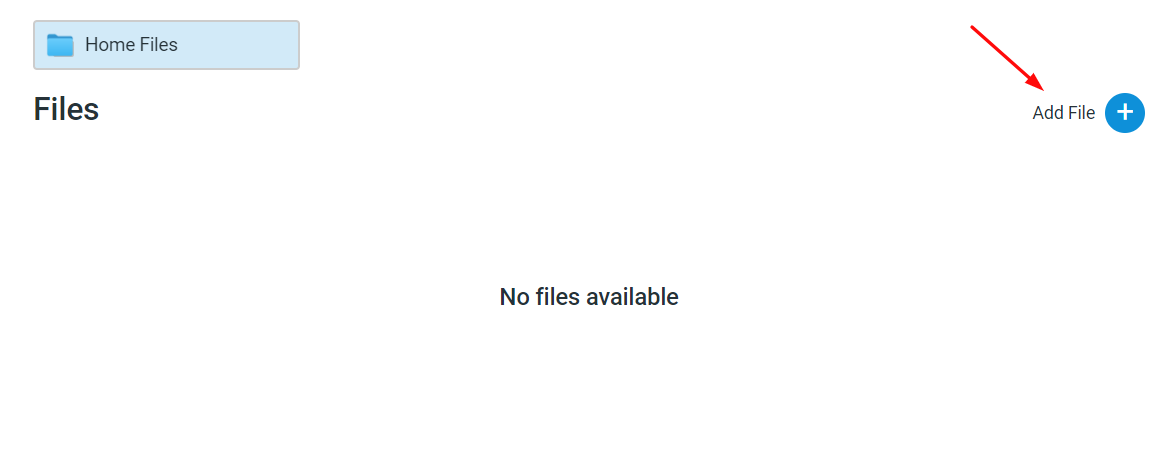
Upon clicking the “Add File” button, the admin can include photos or videos that are relevant to the selected property.
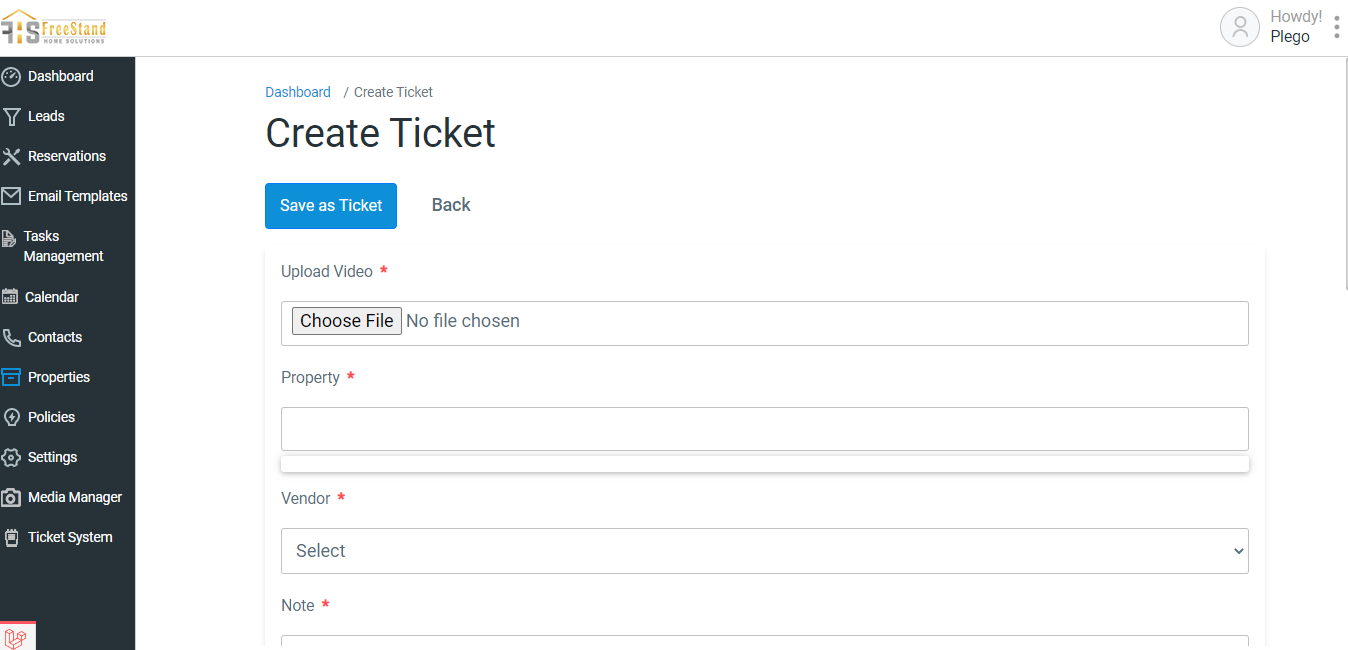
Ticket Manager
The admin can allocate tasks to employees by generating a ticket, which will subsequently be displayed here, along with its current status. In the “Action” column, the admin has the option to edit or delete the ticket information.
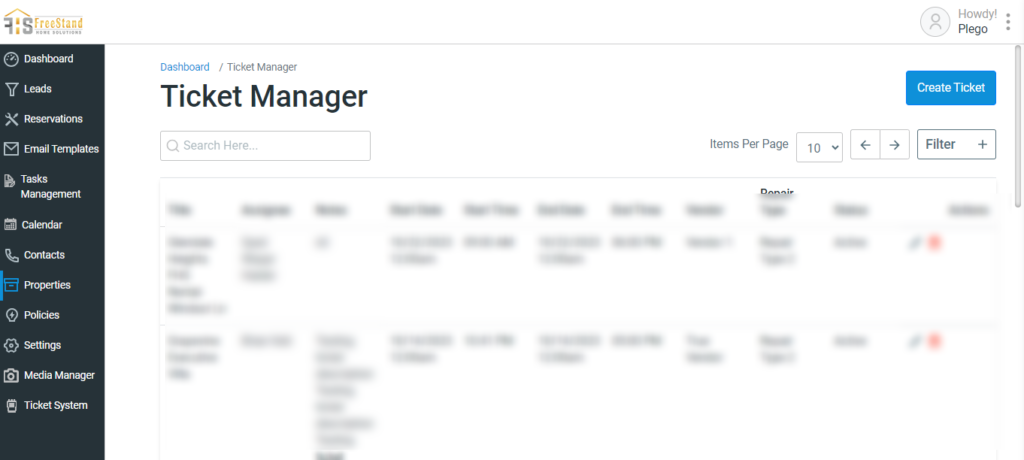
Clicking the “Create Ticket” button redirects the admin to the following page, enabling them to input the task details, which include the vendor and assignee names, among other necessary information.